作用
快速切换不同的配置环境,比如开发时是连接的本地数据库,发布线上时是另外的数据库,每次编译打包时都要修该配置文件比较麻烦,这时就可以使用环境隔离了。
一、配置
本地(Local) 开发(Dev) 测试(Beta) 线上(Prod)
打pom文件,添加如下配置
<build>
    <resources>
        <resource><!--私有配置目录,用变量名来区分-->
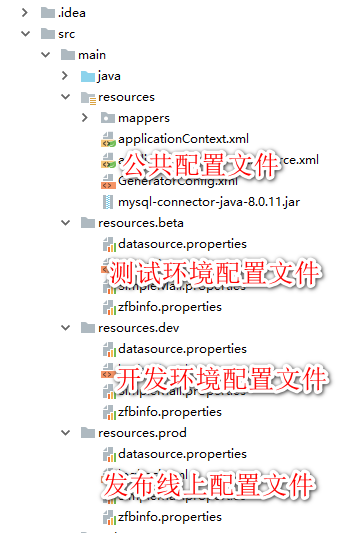
            <directory>src/main/resources.${deploy.type}</directory>
            <excludes><!--排除jsp文件-->
                <exclude>*.jsp</exclude>
            </excludes>
        </resource>
        <resource><!--公共配置目录-->
            <directory>src/main/resources</directory>
        </resource>
    </resources>
</build>
<profiles>
    <profile>
        <id>dev</id>
        <activation><!--默认环境-->
            <activeByDefault>true</activeByDefault>
        </activation>
        <properties><!--对应变量名-->
            <deploy.type>dev</deploy.type>
        </properties>
    </profile>
    <profile>
        <id>beta</id>
        <properties>
            <deploy.type>beta</deploy.type>
        </properties>
    </profile>
    <profile>
        <id>prod</id>
        <properties>
            <deploy.type>prod</deploy.type>
        </properties>
    </profile>
</profiles>
对应的工程目录结构

二、编译打包
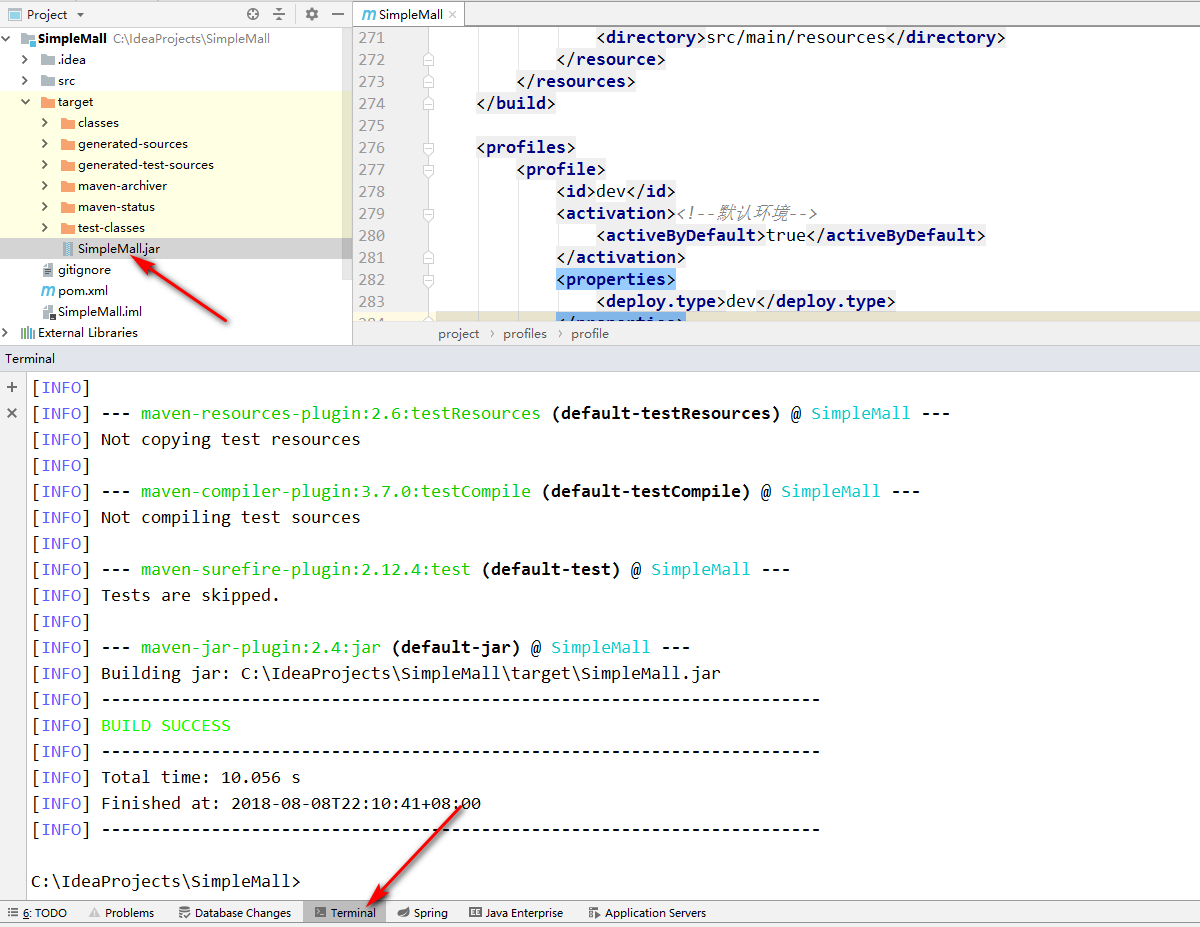
在命令行中输入编译命令,完成后在项目的target文件夹中即可看到jar包
#不编译测试用例类,打包dev环境,改变-P的参数即可切换环境
mvn clean package -Dmaven.test.skip=true -Pdev

三、验证
可以在各个环境中放入不同的文件,编译后用压缩包的形式打开jar包查看是否有指定环境的文件。