一、简介
JUC:JDK5提供了java.util.concurrent(简称JUC)包
在此包中增加了在并发编程中很常用的工具类,用于定义类似于线程的自定义子系统,包括线程池,异步 IO 和轻量级任务框架
还提供了设计用于多线程上下文中的 Collection 实现等
二、volatile 关键字
多个线程访问内存中的共享数据时,彼此是可见的。
public class TestVolatile {
    public static void main(String[] args) {
        MyThread td = new MyThread();
        new Thread(td).start();
        while (true) {
            if (td.isFlag()) {
                System.out.println("------------------");
                break;
            }
        }
    }
}

class MyThread implements Runnable {
    private boolean flag = false;
    @Override
    public void run() {
        try {
            Thread.sleep(200);
        } catch (InterruptedException e) {}
        flag = true;
        System.out.println("flag=" + isFlag());
    }
    public boolean isFlag() {
        return flag;
    }
    public void setFlag(boolean flag) {
        this.flag = flag;
    }
}
上述代码运行,按照预期应该会打印 true 和横杠,但结果不是这样,它会只打印 true ,而且程序不会终止,进入死循环。这就说明两个线程拿到了不一样的flag值。
这里就要引出一个内存可见性的问题,JVM会为每个线程分配一个独立的缓存,用于提高执行效率。内存可见性确保当一个线程修改了对象状态后,其他线程能够看到变化。
Java内存模型(JMM)规定:
1.线程对共享变量的所有操作都必须在自己的工作内存中进行,不能直接从主内存中读取
2.不同线程之间无法直接访问其他线程工作内存中的变量,线程间变量值的传递需要通过主内存来完成
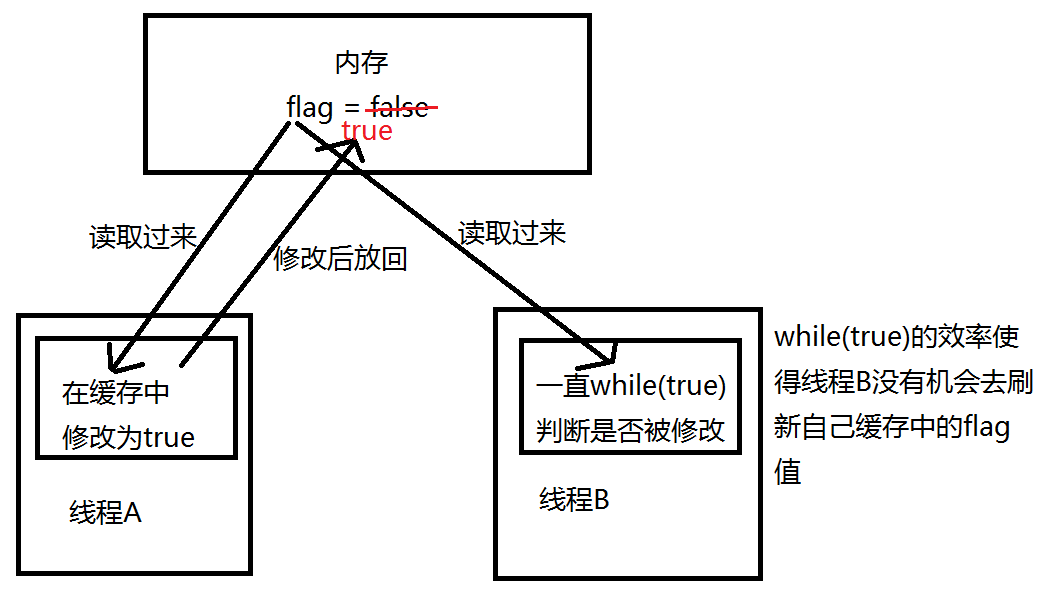
<font color=#009900>volatile关键字实现可见性</font>:
1.保证volatile变量的可见性
2.不保证volatile变量复合操作的原子
3.深入来说是通过加入内存屏障和禁止重排序优化来实现的
<font color=#009900>指令重排序</font>:代码写的顺序与实际执行顺序不同,指令重排序是编译器或处理器为了提高程序性能而做的优化
1.编译器优化的重排序(编译器优化)
2.指令级并行重排序(处理器优化)
3.内存系统的重排序(处理器优化)
<font color=#009900>as-if-serial</font>:无论如何重排序,程序执行结果应与代码顺序执行结果一致
Java编译器,运行时和处理器都会保证Java在单线程下遵循as-if-serial语义
//修改实现
private volatile boolean flag = false;
<font color=#009900>synchronized实现可见性</font>:
synchronized能够实现原子性(同步)和可见性
Java内存模型(JMM)关于synchronized的规定:
1.线程解锁前,必须把共享变量的最新值刷新到主内存中
2.线程加锁时,将清空工作内存中共享变量的值,从而使用共享变量时需要从主存中重新读取最新的值(注意:加锁与解锁需要是同一把锁)
//修改实现
synchronized (td){
    if (td.isFlag()) {
        System.out.println("------------------");
        break;
    }
}
//这样实现效率会非常低
参考文章
三、原子变量与CAS算法
原子性:一个操作是不可再分的,要么全部执行成功要么全部执行失败。没有成功一半的说法。
i++问题
int x = 10;
x = x++;
System.out.println(x);
结果会输出10,i++会分为几个操作执行
int temp = i;//读
i = i + 1;//改和写,这里i++操作就执行完了
i = temp;//赋值
多线程访问i++
public class TestAtomicDemo {
    public static void main(String[] args) {
        AtomicDemo ad = new AtomicDemo();
        for (int i = 0; i < 10; i++) {
            new Thread(ad).start();
        }
    }
}

class AtomicDemo implements Runnable {
    private volatile int serialNumber = 0;
    @Override
    public void run() {
        try {
            Thread.sleep(200);
        } catch (InterruptedException e) {}
        System.out.println(getSerialNumber());
    }

    public int getSerialNumber() {
        return serialNumber++;
    }
}
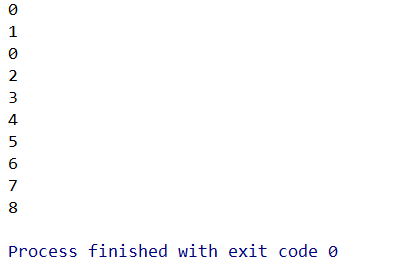
可以看到加了volatile关键字多线程访问还是出现了相同值得情况,这就是因为i++操作不具有原子性
synchronized实现原子性
public synchronized int getSerialNumber() {
    return serialNumber++;
}
//这样效率太低,每次只有一个线程可以访问
使用原子变量,在 java.util.concurrent.atomic 包下提供了一些原子变量,可以保证内存可见性和原子性
class AtomicDemo implements Runnable {

    private AtomicInteger serialNumber = new AtomicInteger(0);

    @Override
    public void run() {
        try {
            Thread.sleep(200);
        } catch (InterruptedException e) {}
        System.out.println(getSerialNumber());
    }

    public int getSerialNumber() {
        // 等同于 serialNumber++
        return serialNumber.getAndIncrement();
    }
}
原子变量的实现:CAS (Compare-And-Swap) 算法
是一种硬件对并发的支持,针对多处理器操作而设计的处理器中的一种特殊指令,用于管理对共享数据的并发访问。
CAS 包含了 3 个操作数:
1.需要读写的内存值 V
2.进行比较的值 A
3.拟写入的新值 B
4.当且仅当 V 的值等于 A 时, CAS 通过原子方式用新值 B 来更新 V 的值,否则不会执行任何操作。
//模拟CAS算法
public class TestCompareAndSwap {
    public static void main(String[] args) {
        final CompareAndSwap cas = new CompareAndSwap();
        for (int i = 0; i < 10; i++) {
            new Thread(new Runnable() {
                @Override
                public void run() {
                    int expectedValue = cas.get();
                    boolean b = cas.compareAndSet(expectedValue, (int) (Math.random() * 101));
                    System.out.println(b);
                }
            }).start();
        }
    }
}

class CompareAndSwap {
    private int value;

    //获取内存值
    public synchronized int get() {
        return value;
    }

    //比较
    public synchronized int compareAndSwap(int expectedValue, int newValue) {
        int oldValue = value;
        if (oldValue == expectedValue) {
            this.value = newValue;
        }
        return oldValue;
    }

    //设置
    public synchronized boolean compareAndSet(int expectedValue, int newValue) {
        return expectedValue == compareAndSwap(expectedValue, newValue);
    }
}
四、ConcurrentHashMap的锁分段机制
ConcurrentHashMap 同步容器类是Java 5 增加的一个线程安全的哈希表。对与多线程的操作,介于 HashMap 与 Hashtable 之间。内部采用“锁分段”机制替代 Hashtable 的独占锁。进而提高性能
此包还提供了设计用于多线程上下文中的 Collection 实现:
- ConcurrentHashMap
- ConcurrentSkipListMap
- ConcurrentSkipListSet
- CopyOnWriteArrayList
- CopyOnWriteArraySet
当期望许多线程访问一个给定 collection 时, ConcurrentHashMap 通常优于同步的 HashMap,ConcurrentSkipListMap 通常优于同步的 TreeMap。当期望的读数和遍历远远大于列表的更新数时, CopyOnWriteArrayList 优于同步的 ArrayList。
//集合迭代时候进行操作
public class TestCopyOnWriteArrayList {
    public static void main(String[] args) {
        HelloThread ht = new HelloThread();

        for (int i = 0; i < 10; i++) {
            new Thread(ht).start();
        }
    }
}
class HelloThread implements Runnable {
    private static CopyOnWriteArrayList<String> list = new CopyOnWriteArrayList<>();

    static {
        list.add("AA");
        list.add("BB");
        list.add("CC");
    }

    @Override
    public void run() {
        Iterator<String> it = list.iterator();
        while (it.hasNext()) {
            System.out.println(it.next());
            list.add("AA");
        }
    }
}
五、闭锁 CountDownLatch
CountDownLatch 一个同步辅助类,在完成一组正在其他线程中执行的操作之前,它允许一个或多个线程一直等待。
//计算多个线程执行的时间
public class TestCountDownLatch {

    public static void main(String[] args) {
        //闭锁初始为50
        final CountDownLatch latch = new CountDownLatch(50);
        LatchDemo ld = new LatchDemo(latch);
        long start = System.currentTimeMillis();
        for (int i = 0; i < 50; i++) {
            new Thread(ld).start();
        }
        try {
            //闭锁为0后继续执行
            latch.await();
        } catch (InterruptedException e) {}
        long end = System.currentTimeMillis();
        System.out.println("耗费时间为:" + (end - start));
    }
}

class LatchDemo implements Runnable {

    private CountDownLatch latch;

    public LatchDemo(CountDownLatch latch) {
        this.latch = latch;
    }

    @Override
    public void run() {
        try {
            for (int i = 0; i < 50000; i++) {
                if (i % 2 == 0) {
                    System.out.println(i);
                }
            }
        } finally {
            //每执行完一个线程递减一
            latch.countDown();
        }
    }
}
六、Callable 接口创建线程
1.Callable 接口类似于 Runnable,但 Runnable 不会返回结果,并且无法抛出经过检查的异常
2.Callable 需要依赖FutureTask , FutureTask 也可以用作闭锁
public class TestCallable {

    public static void main(String[] args) {
        ThreadDemo td = new ThreadDemo();
        //执行 Callable 方式,需要 FutureTask 实现类的支持,用于接收运算结果。
        FutureTask<Integer> result = new FutureTask<>(td);
        new Thread(result).start();
        try {
            //接收线程运算后的结果
            Integer sum = result.get();
            //会等到线程执行完毕打印,即 FutureTask 可用于闭锁
            System.out.println(sum);
            System.out.println("------------------------------------");
        } catch (InterruptedException | ExecutionException e) {
            e.printStackTrace();
        }
    }
}

class ThreadDemo implements Callable<Integer> {
    @Override
    public Integer call() throws Exception {
        int sum = 0;
        for (int i = 0; i <= 100000; i++) {
            sum += i;
        }
        return sum;
    }
}
七、Lock 同步锁
显示锁 Lock:
在 Java 5.0 之前,协调共享对象的访问时可以使用的机制只有 synchronized 和 volatile 。 Java 5.0 后增加了一些 新的机制,但并不是一种替代内置锁的方法,而是当内置锁不适用时,作为一种可选择的高级功能。
ReentrantLock 实现了 Lock 接口,并提供了与 synchronized 相同的互斥性和内存可见性。但相较于synchronized 提供了更高的处理锁的灵活性。
//模仿买票流程
public class TestLock {
    public static void main(String[] args) {
        Ticket ticket = new Ticket();
        new Thread(ticket, "1号窗口").start();
        new Thread(ticket, "2号窗口").start();
        new Thread(ticket, "3号窗口").start();
    }
}

class Ticket implements Runnable {

    private int tick = 100;
    private Lock lock = new ReentrantLock();

    @Override
    public void run() {
        while (true) {
            lock.lock(); //上锁
            try {
                if (tick > 0) {
                    try {
                        Thread.sleep(200);
                    } catch (InterruptedException e) {}
                    System.out.println(Thread.currentThread().getName() + " 完成售票,余票为:" + --tick);
                }
            } finally {
                lock.unlock(); //释放锁,相对于synchronized可能出现死锁
            }
        }
    }
}
八、使用 Lock 同步锁完成唤醒机制
以经典的生产者和消费者为例
用 Object 加 synchronized 实现:
- wait:告诉当前线程放弃执行权,并放弃监锁入阻塞状态,直到其他线程持并持有了相同的锁并调用notify为止
- notify:唤醒持有同一个锁中调用wait的第一个线程,被唤醒的线程是进入了可运行状态。等待cpu分配时间片
- notifyAll:唤醒持有同一锁中调用wait的所有的线程
虚假唤醒问题:

public class TestProductorAndConsumer {
    public static void main(String[] args) {
        Clerk clerk = new Clerk();
        Productor pro = new Productor(clerk);
        Consumer cus = new Consumer(clerk);
        new Thread(pro, "生产者 A").start();
        new Thread(cus, "消费者 B").start();
        new Thread(pro, "生产者 C").start();
        new Thread(cus, "消费者 D").start();
    }
}

//店员
class Clerk {
    private int product = 0;
    //进货
    public synchronized void get() {
        while (product >= 1) { // 避免虚假唤醒
            System.out.println("产品已满!");
            try {
                this.wait();
            } catch (InterruptedException e) {}
        }
        System.out.println(Thread.currentThread().getName() + " : " + ++product);
        this.notifyAll();
    }

    //卖货
    public synchronized void sale() {
        while (product <= 0) { // 避免虚假唤醒
            System.out.println("缺货!");
            try {
                this.wait();
            } catch (InterruptedException e) {}
        }
        System.out.println(Thread.currentThread().getName() + " : " + --product);
        this.notifyAll();
    }
}
//生产者
class Productor implements Runnable {
    private Clerk clerk;
    public Productor(Clerk clerk) {
        this.clerk = clerk;
    }
    @Override
    public void run() {
        for (int i = 0; i < 20; i++) {
            try {
                Thread.sleep(200);
            } catch (InterruptedException e) {}
            clerk.get();
        }
    }
}
//消费者
class Consumer implements Runnable {
    private Clerk clerk;
    public Consumer(Clerk clerk) {
        this.clerk = clerk;
    }
    @Override
    public void run() {
        for (int i = 0; i < 20; i++) {
            clerk.sale();
        }
    }
}
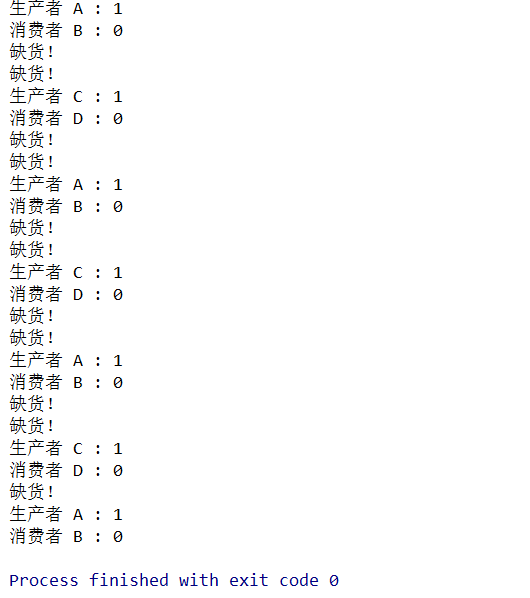
产生的都是有效数据,不会缺货了还在卖
用 Lock 同步锁实现,Condition控制线程通信
Condition 接口描述了可能会与锁有关联的条件变量。这些变量在用法上与使用 Object.wait 访问的隐式监视器类似,但提供了更强大的功能。需要特别指出的是,单个 Lock 可能与多个 Condition 对象关联。为了避免兼容性问题, Condition 方法的名称与对应的 Object 版本中的不同
在 Condition 对象中,与 wait、 notify 和 notifyAll 方法对应的分别是await、 signal 和 signalAll
Condition 实例实质上被绑定到一个锁上。要为特定 Lock 实例获得Condition 实例,使用其 newCondition() 方法
public class TestProductorAndConsumerForLock {
    public static void main(String[] args) {
        Clerk clerk = new Clerk();
        Productor pro = new Productor(clerk);
        Consumer con = new Consumer(clerk);
        new Thread(pro, "生产者 A").start();
        new Thread(con, "消费者 B").start();
    }
}

class Clerk {
    private int product = 0;
    private Lock lock = new ReentrantLock();
    private Condition condition = lock.newCondition();
    // 进货
    public void get() {
        lock.lock();
        try {
            if (product >= 1) { // 为了避免虚假唤醒,应该总是使用在循环中。
                System.out.println("产品已满!");
                try {
                    condition.await();
                } catch (InterruptedException e) {}
            }
            System.out.println(Thread.currentThread().getName() + " : " + ++product);
            condition.signalAll();
        } finally {
            lock.unlock();
        }
    }
    // 卖货
    public void sale() {
        lock.lock();
        try {
            if (product <= 0) {
                System.out.println("缺货!");
                try {
                    condition.await();
                } catch (InterruptedException e) {}
            }
            System.out.println(Thread.currentThread().getName() + " : " + --product);
            condition.signalAll();
        } finally {
            lock.unlock();
        }
    }
}
// 生产者
class Productor implements Runnable {
    private Clerk clerk;
    public Productor(Clerk clerk) {
        this.clerk = clerk;
    }
    @Override
    public void run() {
        for (int i = 0; i < 20; i++) {
            try {
                Thread.sleep(200);
            } catch (InterruptedException e) {
                e.printStackTrace();
            }
            clerk.get();
        }
    }
}
// 消费者
class Consumer implements Runnable {
    private Clerk clerk;
    public Consumer(Clerk clerk) {
        this.clerk = clerk;
    }
    @Override
    public void run() {
        for (int i = 0; i < 20; i++) {
            clerk.sale();
        }
    }
}
九、线程按序交替问题
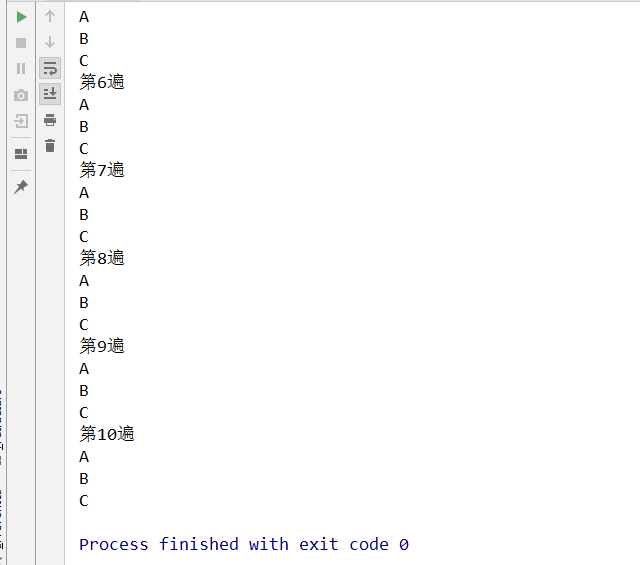
编写一个程序,开启 3 个线程,这三个线程的 ID 分别为A、 B、 C,每个线程将自己的 ID 在屏幕上打印 10 遍,要求输出的结果必须按顺序显示
如: ABCABCABC…… 依次递归
//方式一,一直循环,开销有点大
public class Demo {
    public static void main(String[] args) {
        final String[] x = {"A"};
        new Thread(new Runnable() {
            @Override
            public void run() {
                for (int i = 0; i < 10; i++) {
                    while (true){
                        if (x[0].equals(Thread.currentThread().getName())){
                            System.out.println("第"+ (i+1) +"遍");
                            System.out.println(Thread.currentThread().getName());
                            x[0] = "B";
                            break;
                        }
                    }
                }
            }
        }, "A").start();
        new Thread(new Runnable() {
            @Override
            public void run() {
                for (int i = 0; i < 10; i++) {
                    while (true){
                        if (x[0].equals(Thread.currentThread().getName())){
                            System.out.println(Thread.currentThread().getName());
                            x[0] = "C";
                            break;
                        }
                    }
                }
            }
        }, "B").start();
        new Thread(new Runnable() {
            @Override
            public void run() {
                for (int i = 0; i < 10; i++) {
                    while (true){
                        if (x[0].equals(Thread.currentThread().getName())){
                            System.out.println(Thread.currentThread().getName());
                            x[0] = "A";
                            break;
                        }
                    }
                }
            }
        }, "C").start();
    }
}
//方式二
public class Demo2 {
    public static void main(String[] args) {
        final int[] x = {1};
        Lock lock = new ReentrantLock();
        Condition conditiona = lock.newCondition();
        Condition conditionb = lock.newCondition();
        Condition conditionc = lock.newCondition();

        new Thread(new Runnable() {
            @Override
            public void run() {
                for (int i = 0; i < 10; i++) {
                    if (x[0] != 1){
                        try {
                            conditiona.await();
                        } catch (InterruptedException e) {
                            e.printStackTrace();
                        }
                    }
                    System.out.println(Thread.currentThread().getName());
                    x[0] = 2;
                    conditionb.signal();
                }
            }
        }, "A").start();
        new Thread(new Runnable() {
            @Override
            public void run() {
                for (int i = 0; i < 10; i++) {
                    if (x[0] != 2){
                        try {
                            conditionb.await();
                        } catch (InterruptedException e) {
                            e.printStackTrace();
                        }
                    }
                    System.out.println(Thread.currentThread().getName());
                    x[0] = 3;
                    conditionc.signal();
                }
            }
        }, "B").start();
        new Thread(new Runnable() {
            @Override
            public void run() {
                for (int i = 0; i < 10; i++) {
                    if (x[0] != 3){
                        try {
                            conditionc.await();
                        } catch (InterruptedException e) {
                            e.printStackTrace();
                        }
                    }
                    System.out.println(Thread.currentThread().getName());
                    x[0] = 1;
                    conditiona.signal();
                }
            }
        }, "C").start();
    }
}
十、ReadWriteLock 读写锁
ReadWriteLock 维护了一对相关的锁,一个用于只读操作,另一个用于写入操作。只要没有 writer,读取锁可以由多个 reader 线程同时保持。写入锁是独占的。。
ReadWriteLock 读取操作通常不会改变共享资源,但执行写入操作时,必须独占方式来获取锁。对于读取操作占多数的数据结构。 ReadWriteLock 能提供比独占锁更高的并发性。而对于只读的数据结构,其中包含的不变性可以完全不需要考虑加锁操作
读锁与读锁不互斥,读锁与写锁互斥,写锁与写锁互斥。
public class TestReadWriteLock {

    public static void main(String[] args) {
        ReadWriteLockDemo rw = new ReadWriteLockDemo();
        new Thread(new Runnable() {
            @Override
            public void run() {
                rw.set((int) (Math.random() * 101));
            }
        }, "Write:").start();
        for (int i = 0; i < 100; i++) {
            new Thread(new Runnable() {
                @Override
                public void run() {
                    rw.get();
                }
            }).start();
        }
    }
}

class ReadWriteLockDemo {
    private int number = 0;
    private ReadWriteLock lock = new ReentrantReadWriteLock();
    //读
    public void get() {
        lock.readLock().lock(); //上锁
        try {
            System.out.println(Thread.currentThread().getName() + " : " + number);
        } finally {
            lock.readLock().unlock(); //释放锁
        }
    }
    //写
    public void set(int number) {
        lock.writeLock().lock();
        try {
            System.out.println(Thread.currentThread().getName());
            this.number = number;
        } finally {
            lock.writeLock().unlock();
        }
    }
}
十一、线程八锁
使用线程常见的八种情况
1.两个普通同步方法,两个线程,打印 //one two
public class TestThread1Monitor {
    public static void main(String[] args) {
        Number number = new Number();
        new Thread(new Runnable() {
            @Override
            public void run() {
                number.getOne();
            }
        }).start();
        new Thread(new Runnable() {
            @Override
            public void run() {
                number.getTwo();
            }
        }).start();
    }
}

class Number {
    public synchronized void getOne() {
        System.out.println("one");
    }
    public synchronized void getTwo() {
        System.out.println("two");
    }
}
2.新增 Thread.sleep() 给 getOne(),打印 //one two
public synchronized void getOne() {
    try {
        Thread.sleep(3000);
    } catch (InterruptedException e) {
        e.printStackTrace();
    }
    System.out.println("one");
}
3.新增普通方法 getThree() , 打印 //three one two
public class TestThread3Monitor {
    public static void main(String[] args) {
        Number number = new Number();
        new Thread(new Runnable() {
            @Override
            public void run() {
                number.getOne();
            }
        }).start();
        new Thread(new Runnable() {
            @Override
            public void run() {
                number.getTwo();
            }
        }).start();
        new Thread(new Runnable() {
            @Override
            public void run() {
                number.getThree();
            }
        }).start();
    }
}

class Number {
    public synchronized void getOne() {
        try {
            Thread.sleep(3000);
        } catch (InterruptedException e) {
            e.printStackTrace();
        }
        System.out.println("one");
    }
    public synchronized void getTwo() {
        System.out.println("two");
    }
    public void getThree() {
        System.out.println("three");
    }
}
4.两个普通同步方法,两个 Number 对象,打印 //two one
public class TestThread4Monitor {
    public static void main(String[] args) {
        Number number = new Number();
        Number number2 = new Number();
        new Thread(new Runnable() {
            @Override
            public void run() {
                number.getOne();
            }
        }).start();
        new Thread(new Runnable() {
            @Override
            public void run() {
                number2.getTwo();
            }
        }).start();
    }
}

class Number {
    public synchronized void getOne() {
        try {
            Thread.sleep(3000);
        } catch (InterruptedException e) {
            e.printStackTrace();
        }
        System.out.println("one");
    }
    public synchronized void getTwo() {
        System.out.println("two");
    }
}
5.修改 getOne() 为静态同步方法,打印 //two one
public class TestThread8Monitor {
    public static void main(String[] args) {
        Number number = new Number();
        new Thread(new Runnable() {
            @Override
            public void run() {
                number.getOne();
            }
        }).start();
        new Thread(new Runnable() {
            @Override
            public void run() {
                number.getTwo();
            }
        }).start();
    }
}
class Number {
    public static synchronized void getOne() {
        try {
            Thread.sleep(3000);
        } catch (InterruptedException e) {
            e.printStackTrace();
        }
        System.out.println("one");
    }
    public synchronized void getTwo() {
        System.out.println("two");
    }
}
6.修改两个方法均为静态同步方法,一个 Number 对象 //one two
public static synchronized void getTwo() {
        System.out.println("two");
    }
7.一个静态同步方法,一个非静态同步方法,两个 Number 对象 //two one
public class TestThread7Monitor {
    public static void main(String[] args) {
        Number number = new Number();
        Number number2 = new Number();
        new Thread(new Runnable() {
            @Override
            public void run() {
                number.getOne();
            }
        }).start();
        new Thread(new Runnable() {
            @Override
            public void run() {
                number2.getTwo();
            }
        }).start();
    }
}
class Number {
    public static synchronized void getOne() {
        try {
            Thread.sleep(3000);
        } catch (InterruptedException e) {
            e.printStackTrace();
        }
        System.out.println("one");
    }
    public synchronized void getTwo() {
        System.out.println("two");
    }
}
8.两个静态同步方法,两个 Number 对象 //one two
public class TestThread8Monitor {
    public static void main(String[] args) {
        Number number = new Number();
        Number number2 = new Number();
        new Thread(new Runnable() {
            @Override
            public void run() {
                number.getOne();
            }
        }).start();
        new Thread(new Runnable() {
            @Override
            public void run() {
                number2.getTwo();
            }
        }).start();
    }
}
class Number {
    public static synchronized void getOne() {
        try {
            Thread.sleep(3000);
        } catch (InterruptedException e) {
            e.printStackTrace();
        }
        System.out.println("one");
    }
    public static synchronized void getTwo() {
        System.out.println("two");
    }
}
总结:
①非静态方法的锁默认为 this, 静态方法的锁为对应的 Class 实例
②某一个时刻内,只能有一个线程持有锁,无论几个方法
十一、线程池
线程池可以解决两个不同问题:由于减少了每个任务调用的开销,它们通常可以在执行大量异步任务时提供增强的性能,并且还可以提供绑定和管理资源(包括执行任务集时使用的线程)的方法。每个 ThreadPoolExecutor 还维护着一些基本的统计数据,如完成的任务数。
- ExecutorService newFixedThreadPool() : 创建固定大小的线程池
- ExecutorService newCachedThreadPool() : 缓存线程池,线程池的数量不固定,可以根据需求自动的更改数量
- ExecutorService newSingleThreadExecutor() : 创建单个线程池。线程池中只有一个线程
- ScheduledExecutorService newScheduledThreadPool() : 创建固定大小的线程,可以延迟或定时的执行任务
public class TestThreadPool {
    public static void main(String[] args) throws Exception {
        //创建线程池
        ExecutorService pool = Executors.newFixedThreadPool(5);
        List<Future<Integer>> list = new ArrayList<>();
        for (int i = 0; i < 10; i++) {
            //提交任务到线程池
            Future<Integer> future = pool.submit(new Callable<Integer>() {
                @Override
                public Integer call() throws Exception {
                    int sum = 0;
                    for (int i = 0; i <= 100; i++) {
                        sum += i;
                    }
                    return sum;
                }
            });
            list.add(future);
        }
        //关闭线程池
        pool.shutdown();
        //查看结果
        for (Future<Integer> future : list) {
            System.out.println(future.get());
        }
}

class ThreadPoolDemo implements Runnable {
    private int i = 0;
    @Override
    public void run() {
        while (i <= 100) {
            System.out.println(Thread.currentThread().getName() + " : " + i++);
        }
    }
}
线程调度 ScheduledExecutorService
一个 ExecutorService,可安排在给定的延迟后运行或定期执行的命令
public class TestScheduledThreadPool {
    public static void main(String[] args) throws Exception {
        ScheduledExecutorService pool = Executors.newScheduledThreadPool(5);
        for (int i = 0; i < 5; i++) {
            Future<Integer> result = pool.schedule(new Callable<Integer>() {
                @Override
                public Integer call() throws Exception {
                    int num = new Random().nextInt(100);//生成随机数
                    System.out.println(Thread.currentThread().getName() + " : " + num);
                    return num;
                }
            }, 1, TimeUnit.SECONDS);//一秒后执行
            System.out.println(result.get());
        }
        pool.shutdown();
    }
}
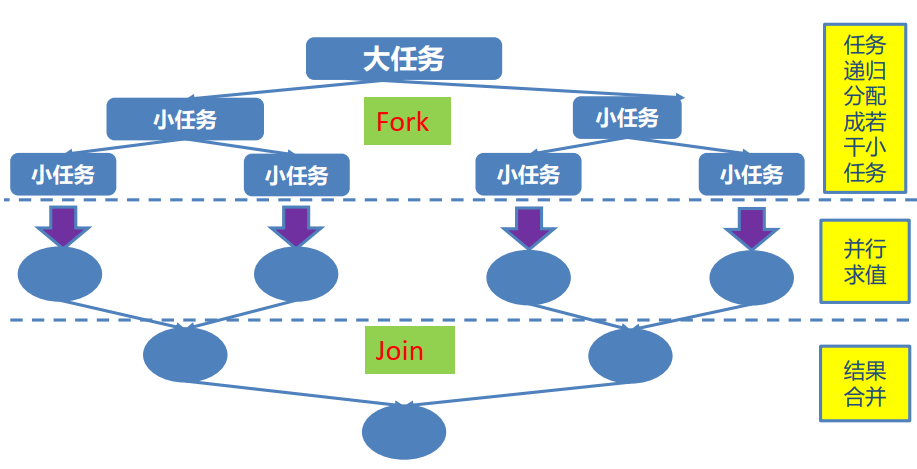
十二、ForkJoinPool 分支/合并框架 工作窃取
Fork/Join 框架:就是在必要的情况下,将一个大任务,进行拆分(fork)成若干个小任务(拆到不可再拆时),再将一个个的小任务运算的结果进行 join 汇总
Divide-and-Conquer
//计算1加到100
public class Demo3 {
    public static void main(String[] args) {
        ForkJoinPool pool = new ForkJoinPool();
        ForkJoinTask<Long> js = new Js(1L,100L);
        Long restul = pool.invoke(js);
        System.out.println(restul);
    }
}
class Js extends RecursiveTask<Long>{
    private Long a;
    private Long b;
    public Js(Long a, Long b) {
        this.a = a;
        this.b = b;
    }
    @Override
    protected Long compute() {
        if (b-a < 10) {
            long sum = 0;
            for (Long i = a; i <= b; i++) {
                sum += i;
            }
            return sum;
        } else {
            Js left = new Js(a, (a+b)/2);
            left.fork(); //进行拆分,同时压入线程队列
            Js right = new Js((a+b)/2+1, b);
            right.fork(); //进行拆分,同时压入线程队列
            return left.join() + right.join();
        }
    }
}
Fork/Join 框架与线程池的区别:
采用 “工作窃取”模式(work-stealing):相对于一般的线程池实现,fork/join框架的优势体现在对其中包含的任务的处理方式上.在一般的线程池中,如果一个线程正在执行的任务由于某些原因无法继续运行,那么该线程会处于等待状态。而在fork/join框架实现中,如果某个子问题由于等待另外一个子问题的完成而无法继续运行。那么处理该子问题的线程会主动寻找其他尚未运行的子问题来执行.这种方式减少了线程的等待时间,提高了性能。